Installing Your HubSpot Integration
Before installing your HubSpot, please ensure you have Admin access in Apex Cloud Telephony.
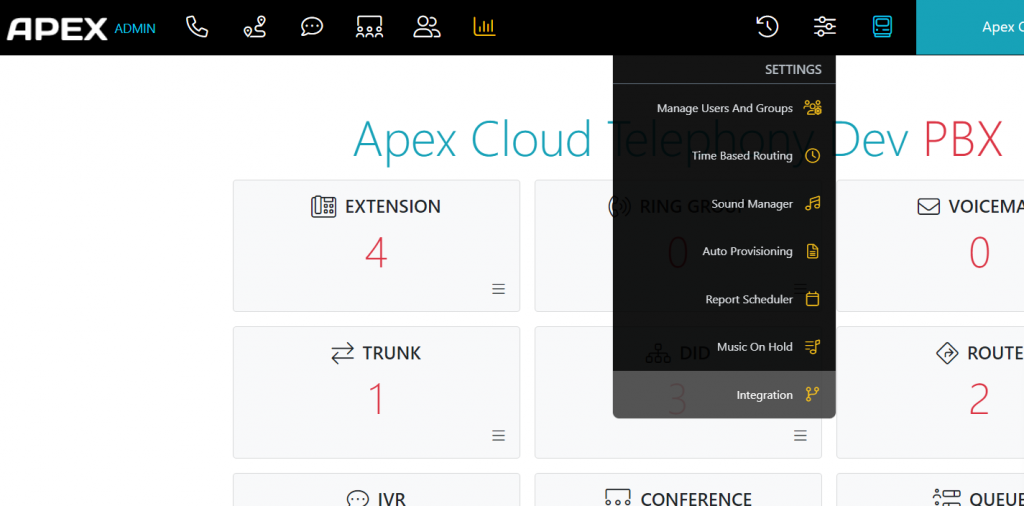
• Log in to the Apex Admin Dashboard
• Select Settings from the top bar menu
• Click on Integration
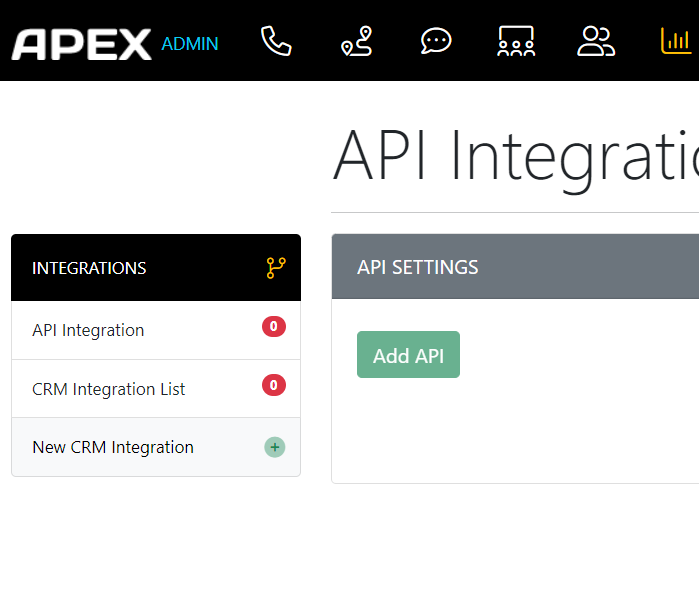
• Click on New CRM Integration from the left side list
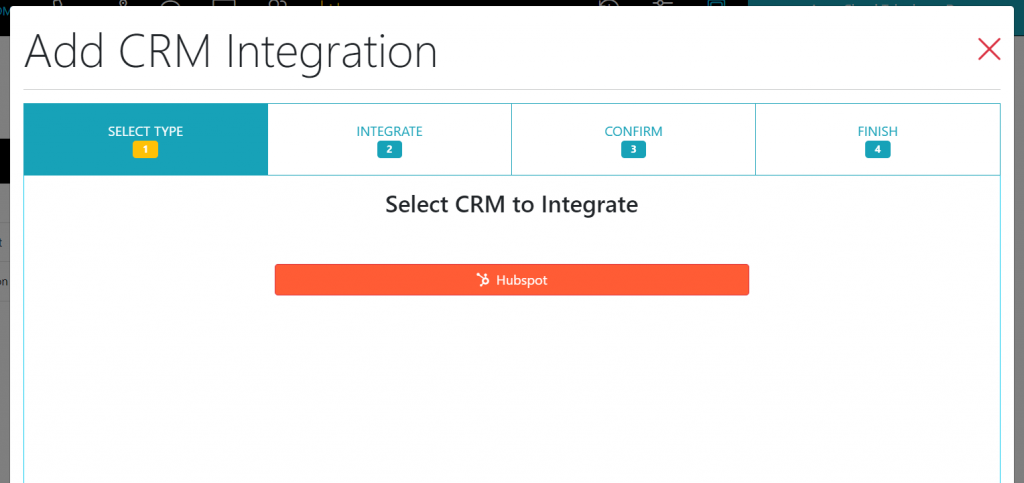
• Click on HubSpot button:
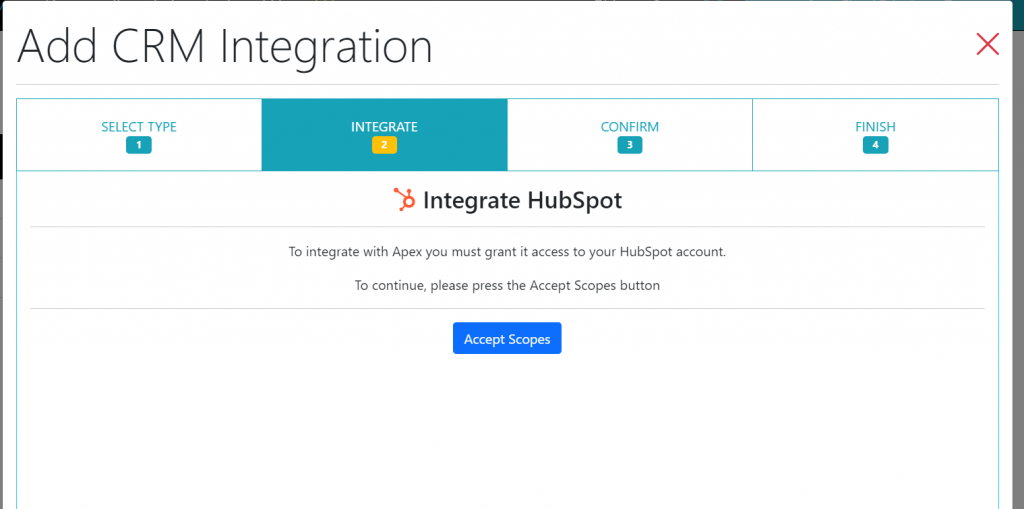
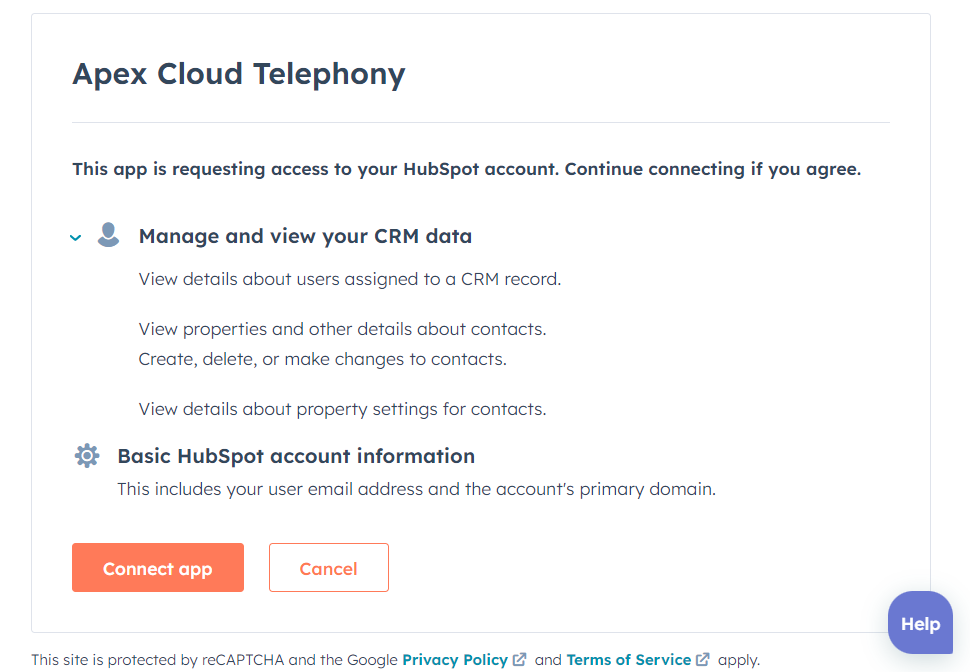
• Accept scopes
• A new pop-up will appear, and you have to sign in with your HubSpot account
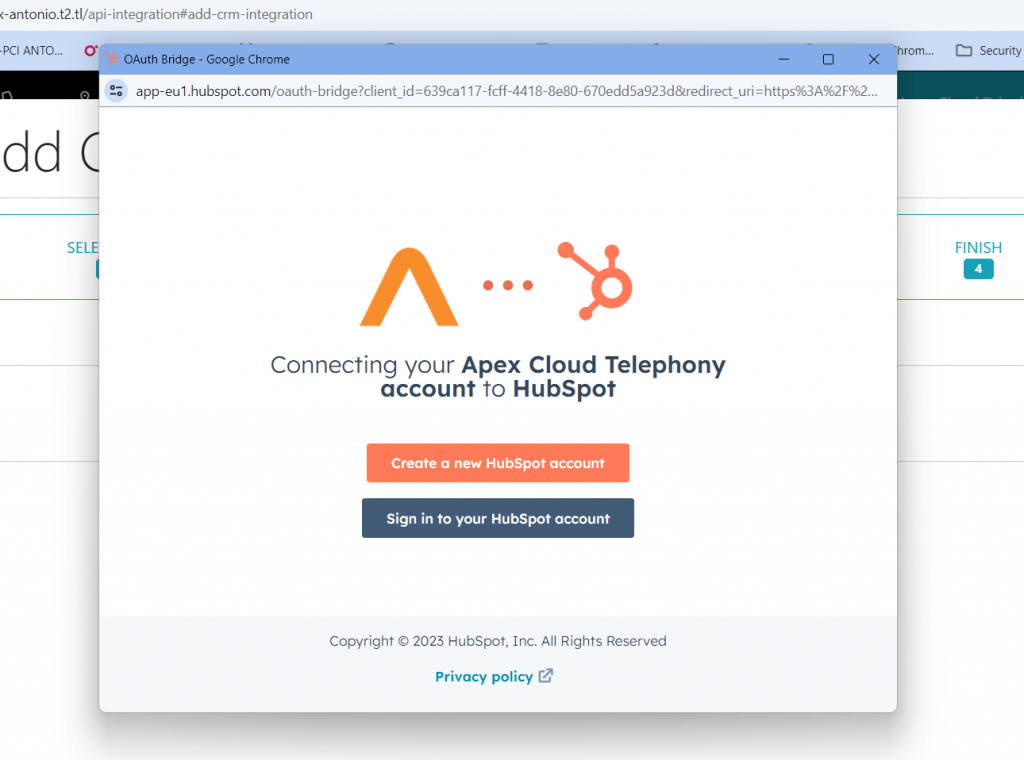
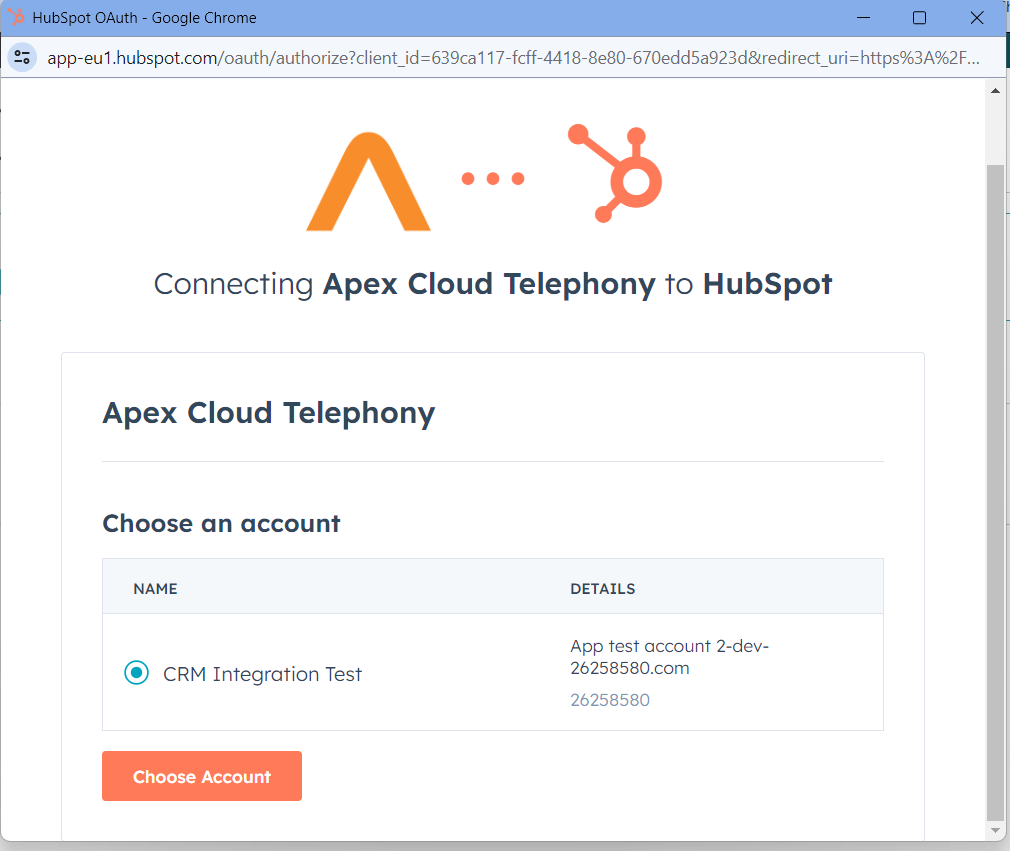
• Choose your HubSpot account where the application will be installed
• Click on Connect app button to accept the permissions and install the app in your HubSpot account
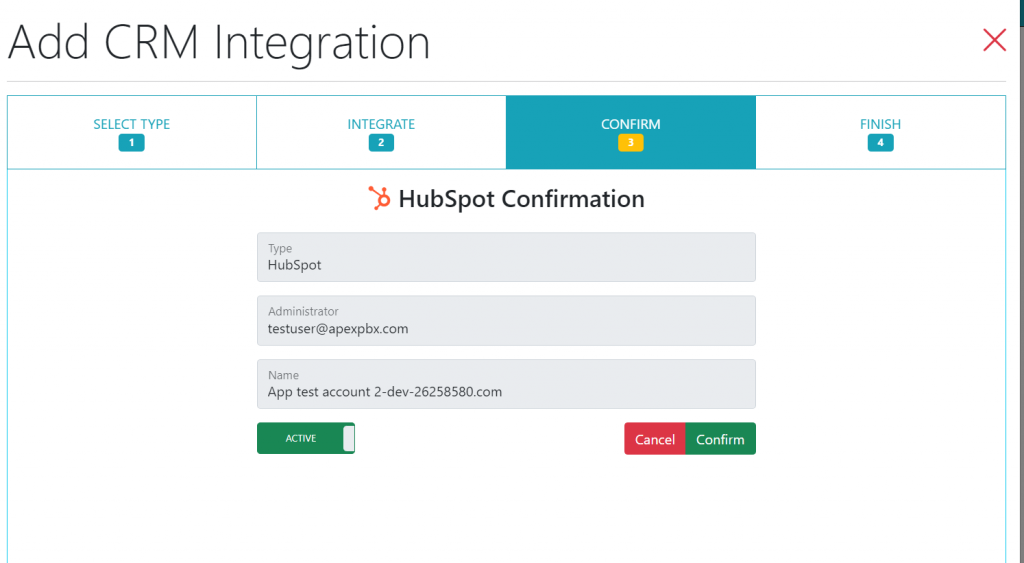
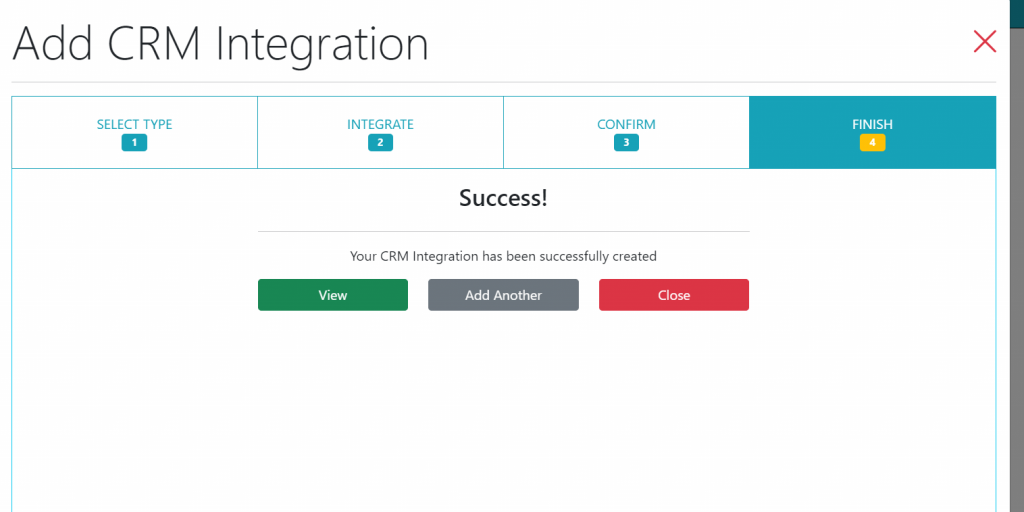
• The window will be closed, and you’ll come back to the previous website to complete the installation, you have to click on Confirm Button
• This message will be shown, and you can view the details of the installation via the View button
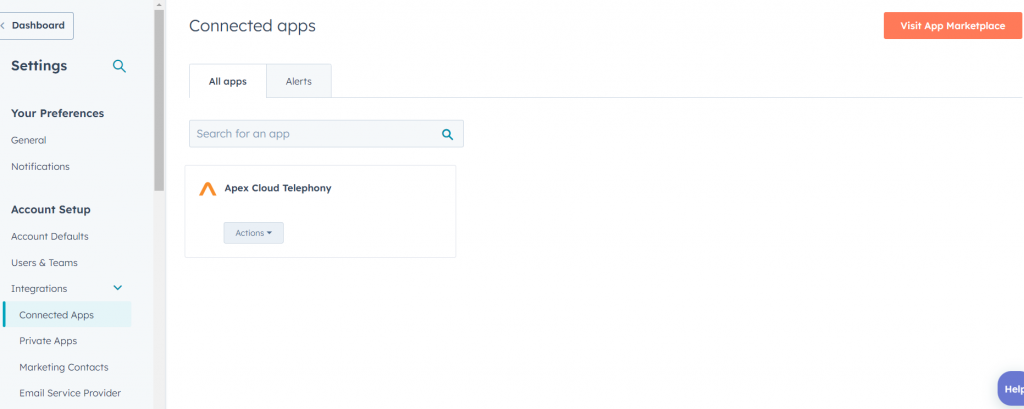
• Now, going to the Connected apps section in your HubSpot Account, you will see this application connected
• To start using the Application, the extension of the Apex Cloud Telephony must install the Desktop App and activate their extension to synchronize their call info with the Hubspot Account
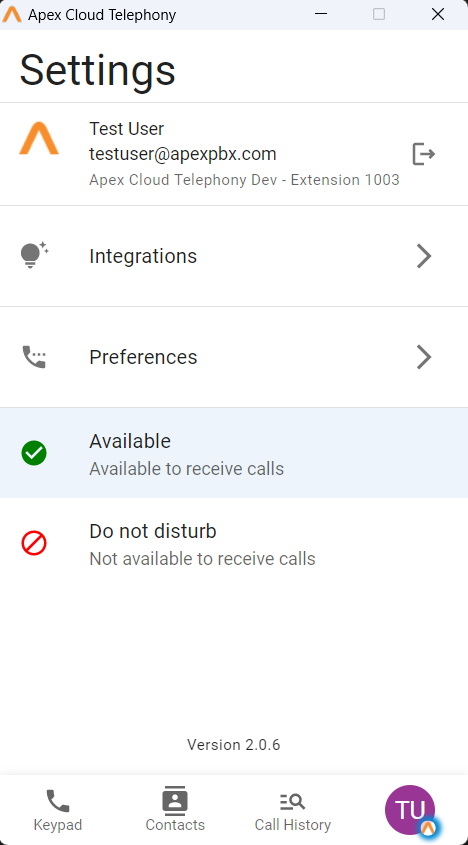
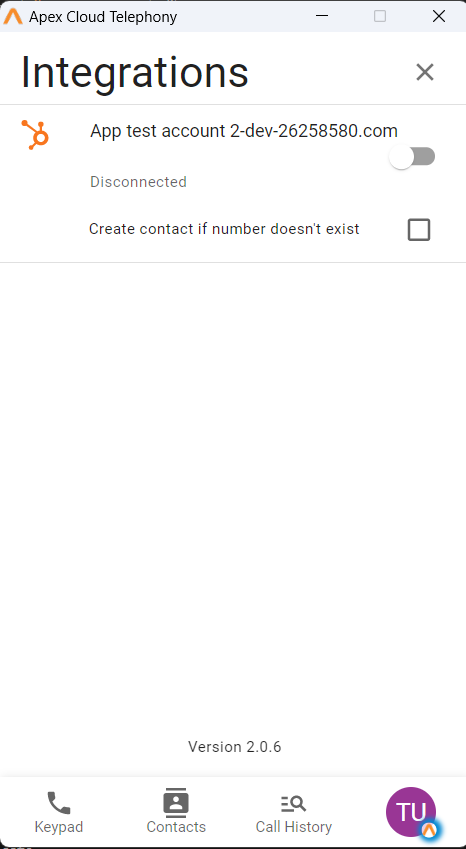
• Go to Settings on the Apex Cloud Telephony desktop app
• Click on Integrations
• Click on the Toggle button to enable the CRM Integration in the extension 1003
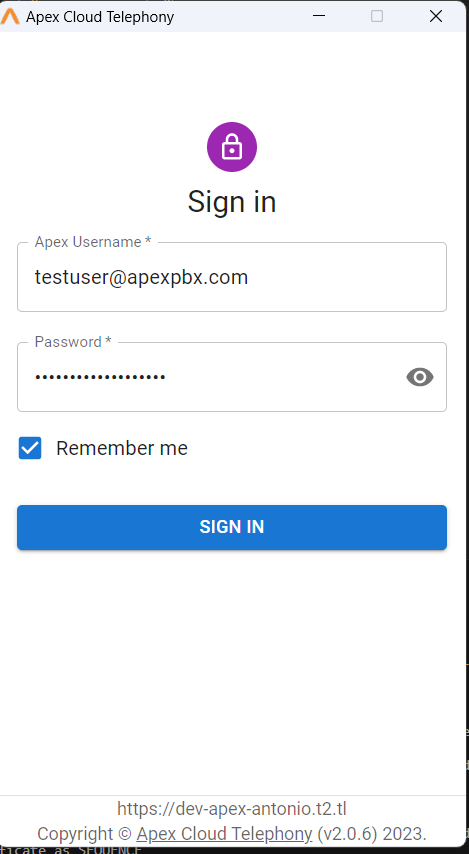
• The OAuth window will be open again
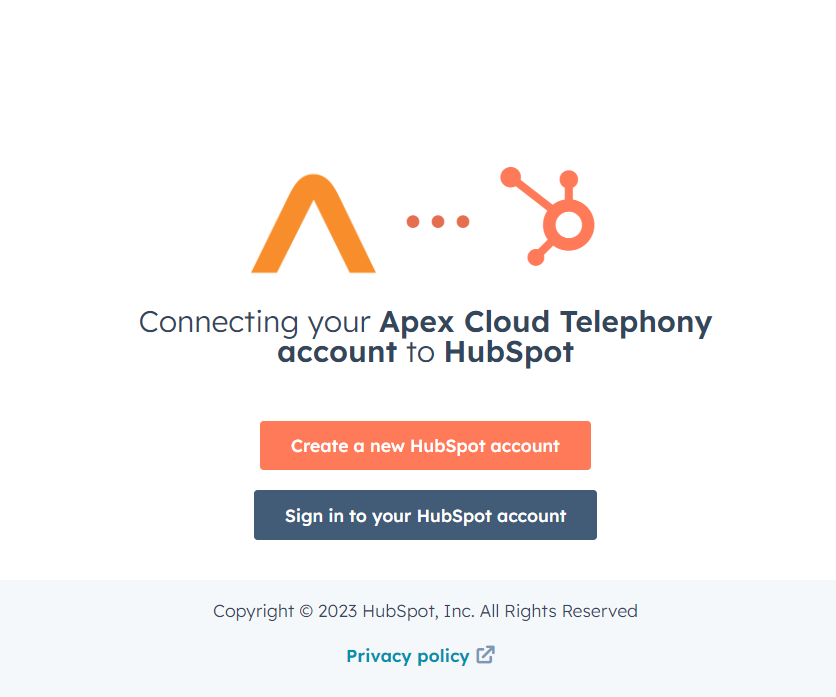
• Choose account
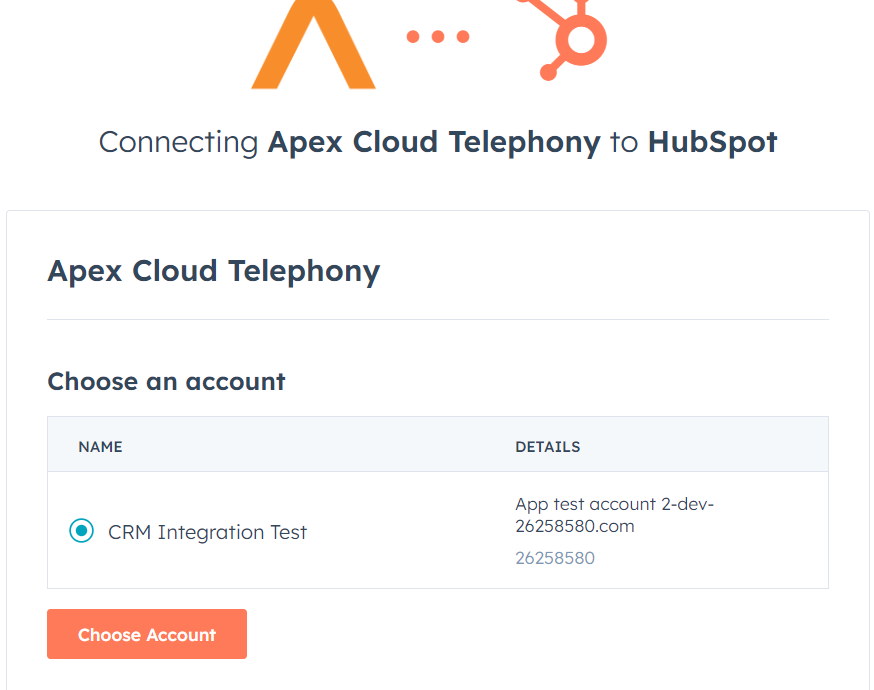
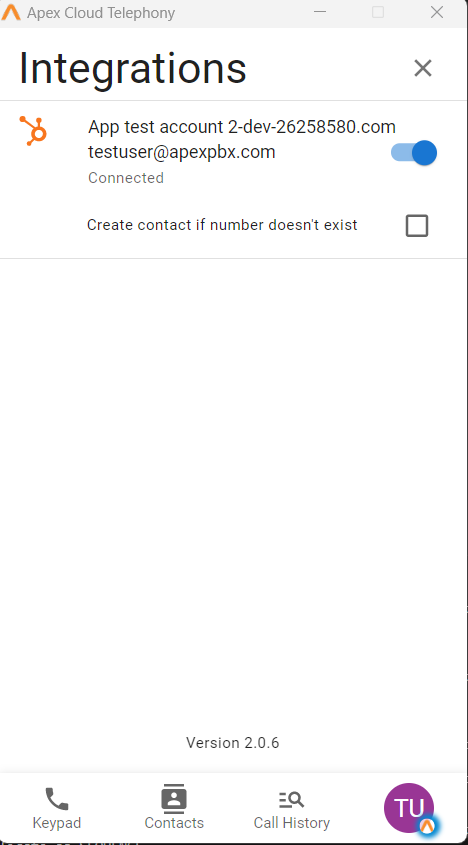
• And your account will be connected
Still in need of assistance? Please get in touch with us at support@apexpbx.com, and we’ll be happy to assist!